Welcome! This manual unlocks the iRig 2’s potential, exploring features, applications, and solutions for a seamless user experience. Discover its capabilities!
What is the iRig 2?
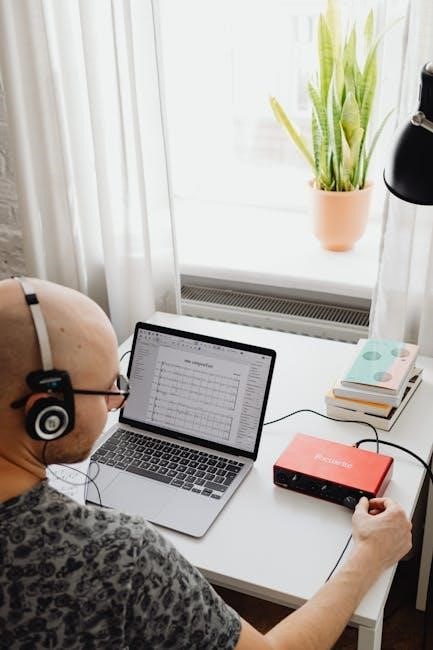
The iRig 2 is a compact and versatile audio interface designed for musicians and creators. It bridges the gap between your instrument – guitar, bass, or keyboard – and your iOS device or computer. This allows for recording, practicing, and live performance with a wide range of apps and software. It’s more than just an adapter; it’s a portable studio solution. The iRig 2 empowers you to explore sonic possibilities, offering a convenient way to capture and manipulate your sound wherever inspiration strikes; Join the community and unlock its potential!
Key Features and Benefits
The iRig 2 boasts a high-quality instrument input, adjustable gain control, and a built-in headphone output for direct monitoring. Its compact design ensures portability, making it ideal for on-the-go recording and practice. Compatibility extends to both iOS devices and computers, offering flexibility in your setup. Benefit from the integrated FX loop for incorporating pedals, and versatile power options – battery or USB. Ultimately, the iRig 2 simplifies your workflow, enhances your sound, and unlocks a world of creative possibilities for musicians.
Package Contents
Your iRig 2 package includes the iRig 2 interface itself, a USB cable for computer connectivity and power, and a Lightning cable for iOS device connection. You’ll also find a set of Velcro straps for cable management, ensuring a tidy setup during performance or recording. Furthermore, the package contains a quick-start guide to get you up and running quickly. Detailed information and software downloads are available on the official website, completing your iRig 2 experience.
Setting Up Your iRig 2
Get connected! Easily link your instrument to iOS devices or computers with the included cables for immediate recording and amplified sound.
Connecting to Your iOS Device
Seamless iOS Integration: Connecting your iRig 2 to your iPhone, iPad, or iPod touch is remarkably straightforward. Begin by plugging the 3.5mm TRRS cable (included) into the iRig 2’s iOS input. Then, insert the other end directly into your device’s headphone jack. Ensure a secure connection for optimal signal transfer.
For newer iOS devices lacking a headphone jack, utilize Apple’s Lightning to 3.5mm Headphone Jack Adapter (sold separately). This adapter bridges the connection, allowing full iRig 2 functionality. Once physically connected, your iOS device will recognize the iRig 2 as an audio interface, ready for your favorite apps!
Connecting to Your Computer
USB Connectivity for Desktop Power: To connect your iRig 2 to a computer (Mac or PC), utilize the included USB cable. Plug the USB Type-B end into the iRig 2’s USB port and the standard USB Type-A end into an available USB port on your computer.
The iRig 2 will be recognized as a standard audio interface. Depending on your operating system, driver installation might be necessary (see section on Driver Installation). This USB connection facilitates both audio input/output and power, allowing for extended recording and practice sessions without relying on batteries.
Powering the iRig 2
Versatile Power Options: The iRig 2 offers flexible powering solutions for convenience. It can operate using either 9V battery power or USB bus power when connected to a computer. To install a 9V battery, open the battery compartment on the iRig 2’s side and insert a standard 9V battery, observing correct polarity.
Alternatively, connecting the iRig 2 to your computer via USB provides power, eliminating the need for batteries during computer-based recording or practice. The unit automatically switches between power sources.

Using the iRig 2 with iOS
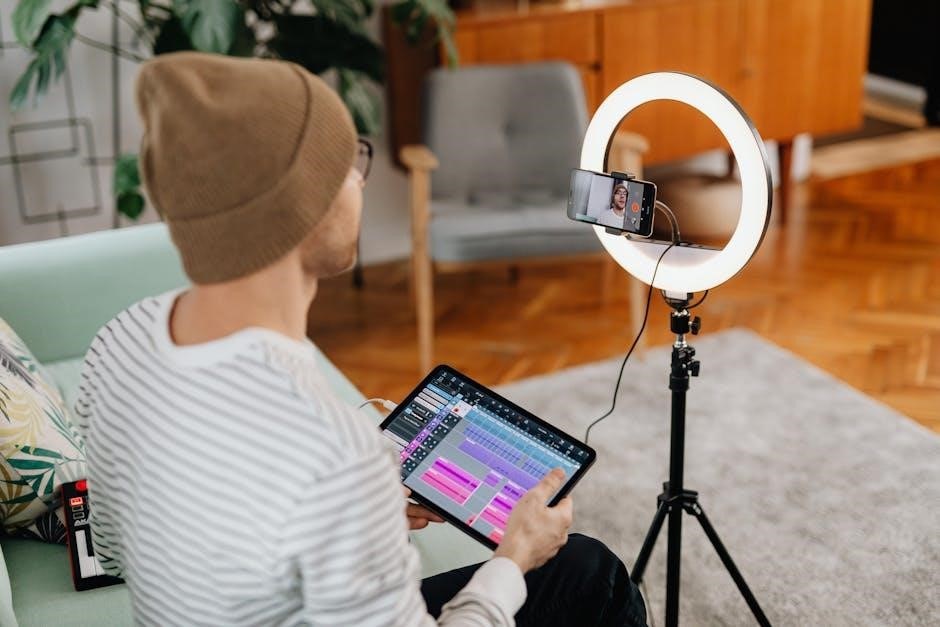
iOS Integration: Connect your instrument to your iOS device via the iRig 2 for mobile jamming, recording, and practicing with compatible apps!
Compatible iOS Apps
Expand Your Sound: The iRig 2 seamlessly integrates with a vast ecosystem of iOS apps, transforming your iPhone or iPad into a powerful mobile music studio. Popular choices include AmpliTube, offering realistic amp and effects modeling, and GarageBand, a versatile digital audio workstation. Explore apps like Tonebridge for automated tone replication, and BIAS FX 2 for advanced amp matching. Many other recording, processing, and learning apps are also compatible, providing endless creative possibilities for guitarists, bassists, and other musicians. Regularly check the iRig website for an updated compatibility list.
Adjusting Input Gain
Optimize Your Signal: The Input Gain knob on your iRig 2 is crucial for achieving optimal audio quality. Start with the knob fully counter-clockwise, then slowly increase the gain while playing your instrument. Watch the iRig 2’s LED indicator; it should illuminate green, occasionally peaking into yellow. Avoid red illumination, which indicates clipping and distortion. Proper gain staging ensures a clean, strong signal without unwanted noise or harshness. Experiment to find the sweet spot for your instrument and chosen app, balancing volume and clarity.
Using the Direct Monitoring Feature
Hear Yourself Clearly: The iRig 2’s Direct Monitoring switch allows you to hear your instrument’s signal directly, bypassing any digital processing for zero-latency monitoring. Engage the switch to hear a pristine, real-time representation of your playing. This is invaluable when recording or practicing, eliminating distracting delays. When disengaged, you’ll hear the processed signal from your iOS device or computer. Experiment with both settings to determine which best suits your workflow and desired monitoring experience for optimal performance.
Using the iRig 2 with a Computer
Connect and Create! Utilize the iRig 2 with your computer for recording and amplifying your sound using compatible software and drivers.
Driver Installation (if required)
Driver Needs? Typically, the iRig 2 functions as a class-compliant audio interface, meaning no specific driver installation is needed for many computers. However, for optimal performance or specific DAW compatibility, a driver might be necessary. Check the official iRig website for the latest driver downloads compatible with your operating system (Windows or macOS).
Follow the provided installation instructions carefully. After installation, restart your computer. Verify successful installation within your system settings, confirming the iRig 2 is recognized as an audio device. If issues arise, consult the troubleshooting section of the manual or online support resources.
Software Compatibility (DAWs)
DAW Integration: The iRig 2 boasts broad compatibility with popular Digital Audio Workstations (DAWs). Expect seamless operation with software like GarageBand, Logic Pro X, Ableton Live, Pro Tools, and Cubase. However, specific setup procedures may vary between DAWs. Consult your DAW’s documentation for instructions on configuring the iRig 2 as an audio interface.
Ensure your DAW recognizes the iRig 2 as an input and output device within its audio preferences. Experiment with different settings to optimize performance and minimize latency. The iRig 2 enhances your recording and production workflow across various platforms.
Setting Sample Rate and Buffer Size
Optimizing Audio Quality: Within your DAW’s audio settings, configuring the sample rate and buffer size is crucial. Higher sample rates (e.g., 44.1kHz, 48kHz, 96kHz) yield greater fidelity, while lower rates conserve processing power. Buffer size dictates latency – smaller buffers reduce delay but demand more CPU.
Start with a buffer size of 256 or 512 samples. If you experience audio glitches, increase the buffer size. Experiment to find the sweet spot balancing low latency for real-time playing and stable performance for recording.

iRig 2 Controls and Indicators
Essential Controls: The iRig 2 features an input gain knob, a direct monitor switch, and a headphone volume control for precise audio adjustments.
Input Gain Knob
Adjusting Signal Strength: The Input Gain Knob on your iRig 2 is crucial for optimizing the signal level from your instrument. Rotating it clockwise increases the gain, making quieter signals louder, while turning it counter-clockwise reduces the gain for louder instruments.
Preventing Distortion: Careful adjustment is key! Setting the gain too high can cause unwanted distortion or clipping, resulting in a harsh sound. Conversely, too low a gain will produce a weak, noisy signal.
Finding the Sweet Spot: Monitor the input level indicator (on your iOS device or computer software) while playing to find the optimal gain setting – loud and clear without distortion.
Direct Monitor Switch
Latency-Free Monitoring: The Direct Monitor switch on the iRig 2 enables you to hear your instrument’s signal directly, bypassing the digital processing of your iOS device or computer. This provides zero-latency monitoring, crucial for a natural playing experience.
Recording & Performance: When engaged, you hear your instrument as it is, without any delay. This is ideal for recording and live performance where timing is critical. Disengaging the switch routes the signal through the device’s processing.
Experiment with Sound: Use the switch to compare your dry signal with the processed sound, aiding in tone shaping and effects adjustments.
Headphone Volume Control
Personalized Listening: The iRig 2 features a dedicated headphone volume control, allowing you to adjust the output level to your preferred listening volume. This ensures comfortable monitoring during practice, recording, or jamming along with backing tracks.
Independent Adjustment: This control operates independently of your device’s volume, providing precise control over your headphone output. It’s essential for protecting your hearing and achieving optimal sound clarity.
Optimal Levels: Adjust the volume gradually to find the sweet spot – loud enough to hear clearly, but not so loud as to cause discomfort or damage.

Troubleshooting Common Issues
Resolve Problems: This section provides solutions for common issues like no sound, distortion, or connection problems, ensuring a smooth iRig 2 experience.
No Sound Output
Troubleshooting Steps: If you experience no sound, first verify all connections – instrument, iRig 2, and iOS device/computer. Ensure the iRig 2’s input gain is appropriately adjusted; too low or too high can cause silence. Check the volume levels on your device, within the app, and on any connected headphones or amplifiers. Confirm the correct input source is selected within your chosen application or DAW.
Further Checks: Test with different cables and headphones to isolate potential hardware issues. Restart your device and the application. If using a computer, verify driver installation and software compatibility. A faulty instrument cable is a common cause, so testing with a known working cable is crucial.
Distorted Sound
Addressing Distortion: Distorted audio often stems from excessive input gain. Reduce the iRig 2’s input gain knob until the distortion disappears. Overdriving the input can clip the signal, resulting in unwanted artifacts. Ensure your instrument’s output volume isn’t too high. Check for any digital clipping within your recording software (DAW) or iOS app – lower the track volume or adjust plugin settings.
Cable & Hardware: A damaged or low-quality cable can also introduce distortion. Try a different cable. Verify your instrument is functioning correctly. If distortion persists, test with a different audio interface to rule out an iRig 2 hardware issue.
Connection Problems
Troubleshooting Connections: If the iRig 2 isn’t recognized, first ensure the cable is securely connected to both your device and the interface. Try a different cable to rule out a faulty connection. For iOS, verify compatibility with your device’s operating system. With computers, confirm proper driver installation (if required) and check your system’s audio settings.
Restart & Test: Restart both your device and the application you’re using. Test the iRig 2 with a different application or instrument to isolate the problem. Ensure the correct input is selected within your software.
Advanced iRig 2 Features
Expand Your Sound! Explore multi-instrument setups, utilize the versatile FX loop, and choose between battery or USB power for optimal performance.
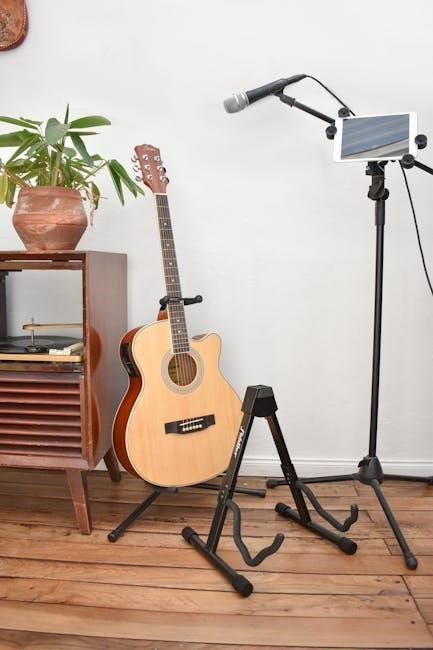
Using with Multiple Instruments
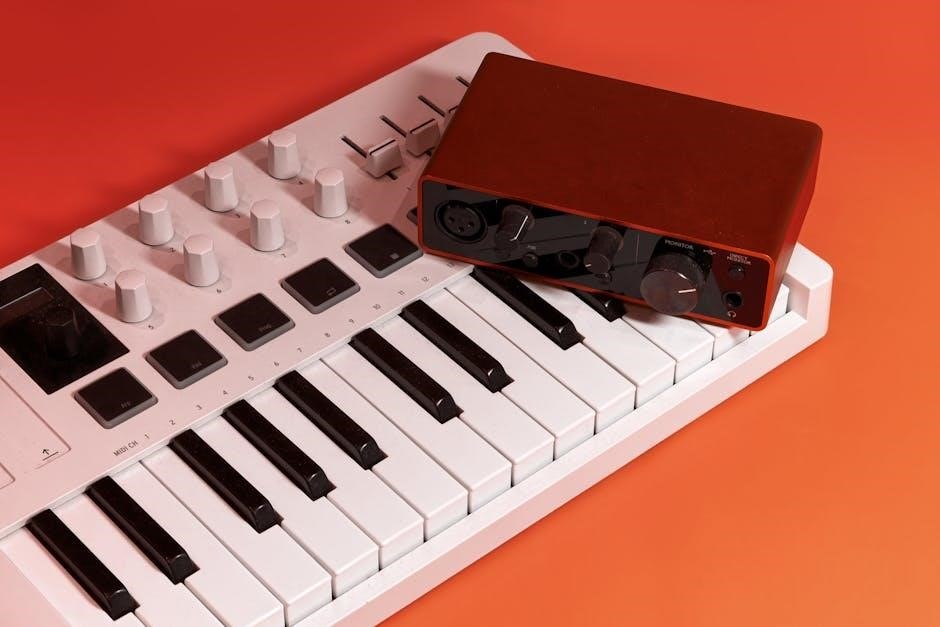
Versatility Unleashed: The iRig 2 isn’t limited to just one instrument! Easily connect guitars, basses, keyboards, and even line-level sources. Experiment with diverse sounds and recording options. Adjust the input gain carefully for each instrument to achieve optimal signal levels and avoid clipping or unwanted noise. Remember to consider impedance matching for the best tonal results. The iRig 2’s adaptable design makes it a truly multi-purpose audio interface, expanding your creative possibilities beyond a single instrument. Explore different combinations and discover new sonic textures!
Utilizing the FX Loop
Expand Your Sonic Palette: The iRig 2’s FX Loop allows seamless integration of your favorite external pedals. Connect them between the iRig 2’s send and return jacks to insert effects into your signal chain before the audio reaches your device. This provides flexibility for shaping your tone with external distortion, modulation, or delay effects. Ensure proper cable connections and gain staging to avoid noise or signal loss. Experiment with different pedal combinations to create unique and personalized sounds, enhancing your recording and performance capabilities.
Powering Options – Battery vs. USB
Flexible Power Solutions: The iRig 2 offers versatile powering options for convenience. You can operate it using a standard 9V battery, ideal for mobile use and situations without USB access. Alternatively, connect the iRig 2 to your computer or a USB power adapter via the micro-USB port for bus-powered operation. USB powering ensures consistent performance during extended sessions; Battery life varies depending on usage; USB provides a reliable, sustainable power source. Choose the option best suited to your needs and environment.

iRig 2 Specifications
Detailed Specs: Explore key technical details including input impedance, frequency response, and maximum input level for optimal performance and compatibility with your gear.
Input Impedance
Understanding Input Impedance: The iRig 2 boasts a carefully engineered input impedance, crucial for matching with a wide array of instruments. This specification dictates how much your guitar or bass “loads” the input circuitry, impacting tone and signal strength. A higher impedance generally suits passive pickups, preserving high frequencies and dynamic range. Conversely, lower impedance is often preferred for active pickups. The iRig 2’s design aims for versatility, accommodating both effectively. Proper impedance matching ensures optimal signal transfer, minimizing tone loss and maximizing clarity, delivering a professional sound quality for recording and live performance.
Frequency Response
Analyzing Frequency Response: The iRig 2’s frequency response defines its ability to accurately reproduce the full spectrum of audible sound. A wider, flatter frequency response indicates greater fidelity, capturing the nuances of your instrument’s tone. This interface is engineered to deliver a comprehensive range, typically spanning from 20Hz to 20kHz – the standard range of human hearing. This ensures that bass frequencies remain punchy, while higher frequencies retain their clarity and sparkle. Accurate frequency reproduction is vital for both recording and live performance, preserving the integrity of your sound.
Maximum Input Level
Understanding Input Limits: The iRig 2’s maximum input level signifies the loudest signal it can handle without introducing distortion or clipping. Exceeding this level results in unwanted artifacts and a degraded audio quality. Typically measured in dBV (decibels relative to 1 volt), a higher maximum input level offers greater headroom. This allows for connecting instruments with stronger outputs, like active pickups. Careful monitoring of the input gain is crucial to stay within safe limits, ensuring a clean and professional recording or performance. Avoid pushing the signal too hard!
Safety Precautions
Protect Your Gear! Take extra care during outdoor use, avoid device damage, and practice proper cable management for optimal iRig 2 performance and longevity.
Outdoor Use Considerations
Environmental Awareness is Key! When utilizing your iRig 2 outdoors, be mindful of temperature extremes and humidity. Avoid direct sunlight exposure for prolonged periods, as it can affect the device’s internal components. Protect the unit from rain, dust, and sand, which can cause damage or malfunction. Ensure a stable and secure setup to prevent accidental drops or impacts. Consider using a protective case or bag for transport and storage. Always disconnect all cables before moving the device. Regularly inspect cables for wear and tear, replacing them as needed to maintain a safe and reliable connection.
Avoiding Damage to the Device
Protect Your Investment! To ensure longevity, handle the iRig 2 with care. Avoid dropping, hitting, or subjecting it to strong impacts. Do not disassemble the unit, as this will void the warranty and potentially cause irreparable damage. Keep liquids away from the device to prevent corrosion. Clean the exterior with a soft, dry cloth; avoid harsh chemicals or abrasive cleaners. Store the iRig 2 in a cool, dry place when not in use. Regularly check all connections for looseness or damage, and replace cables if necessary.
Proper Cable Management
Maintain Organization! Proper cable management extends the life of your iRig 2 and prevents accidental disconnections. Avoid sharply bending or kinking cables, as this can damage internal wiring. When storing, loosely coil cables instead of tightly wrapping them. Secure cables with Velcro straps or cable ties to prevent tangling and strain. Regularly inspect cables for fraying or damage, replacing them promptly if needed. Keep cables away from heat sources and sharp objects. A tidy setup minimizes tripping hazards and ensures optimal performance.

Warranty Information
Coverage Details! This section outlines the iRig 2’s warranty period, what is covered under the guarantee, and the process for submitting a claim.
Warranty Period
Standard Coverage: The iRig 2 is covered by a one-year (12-month) limited warranty from the original date of purchase. This warranty protects against defects in materials and workmanship under normal use. Proof of purchase, such as a receipt or invoice, is required to validate the warranty claim. The warranty period begins on the date the original end-user purchased the iRig 2. Extended warranties may be available through select retailers; check with your point of sale for details. This warranty does not cover misuse, accidents, or unauthorized modifications.
What is Covered
Defect Protection: This warranty covers defects in materials and workmanship of your iRig 2 under normal use conditions. Specifically, it includes malfunctions resulting from manufacturing flaws, faulty components, or assembly errors. The warranty extends to the hardware components of the iRig 2 itself. It does not cover damage caused by accidents, misuse, unauthorized modifications, or normal wear and tear. Cosmetic damage, such as scratches, is also excluded. Software issues or compatibility problems are generally not covered under this hardware warranty.
How to Claim Warranty
Initiate the Process: To initiate a warranty claim, contact official iRig 2 support through their website or designated channels. You’ll need your proof of purchase – a receipt or invoice – and a detailed description of the issue. Prepare to potentially provide photos or videos demonstrating the defect. The support team will issue a Return Merchandise Authorization (RMA) number if the claim is valid. Ship the iRig 2, securely packaged, to the address provided with the RMA clearly visible on the package.
iRig 2 Community and Support
Connect and Learn: Join online forums and the official website for support, share experiences, and discover tips from fellow iRig 2 users!
Online Forums
Engage with Fellow Users: Explore vibrant online forums dedicated to the iRig 2! These platforms are invaluable resources for troubleshooting, sharing creative ideas, and discovering new techniques. Connect with a passionate community of musicians and audio enthusiasts who actively discuss all aspects of the interface.
Find solutions to common issues, ask specific questions, and benefit from the collective knowledge of experienced iRig 2 users; Many forums also feature user-created tutorials, preset libraries, and collaborative projects, enhancing your learning experience and inspiring your musical journey. Search for dedicated iRig 2 forums on popular music production websites.
Official Website
Your Primary Resource: The official iRig 2 website serves as the central hub for all product-related information. Here, you’ll find the most up-to-date documentation, including the complete user manual, firmware updates, and frequently asked questions (FAQs). Access detailed specifications, compatibility lists, and helpful guides to maximize your iRig 2 experience.
Explore additional resources like tutorial videos, example settings, and support articles. The website also provides a direct channel for contacting official support teams should you encounter any issues or require assistance. Regularly check for new content and announcements.
Contacting Support
Need Assistance? For personalized help with your iRig 2, reach out to the dedicated support team. The official website provides various contact methods, including a submission form for detailed inquiries. Expect prompt responses from knowledgeable technicians ready to resolve your issues.
Before contacting support, consult the online FAQs and troubleshooting guides – many common problems have readily available solutions. Be prepared to provide your iRig 2’s serial number and a detailed description of the problem you’re experiencing for efficient assistance.